AItoSocials
  • Home
  • About Us
  • Price
  • Contact
  • Docs
  • Home
  • About Us
  • Price
  • Contact
  • Docs
Download

Getting Started

4
  • How To Update AItoSocial Plugin
  • Requirements
  • AItoSocial, Social Media Auto-Posting And Scheduling Plugin For WordPress Blogs [Full Guide]
  • Quick introduction about the Best Auto-poster plugin, AItoSocial.

Add Social Account

8
  • Add a Facebook account using the Personal App method.
  • How To Auto-publish And Schedule WordPress Posts To TikTok
  • How to add a Pinterest account to the AItoSocial plugin
  • How to add a LinkedIn account to the AItoSocial Plugin
  • How To Auto-Publish And Schedule WordPress Posts On Twitter
  • How To Auto-post And Schedule WordPress Posts To Threads
  • How To Auto-publish And Schedule WordPress Posts To Instagram
  • How To Schedule And Auto-publish To Facebook From WordPress

FAQs

5
  • Social Network Auto-Posting and Scheduling Plugin Proxy Support
  • How to use URL shorteners in the AItoSocial plugin
  • How To Create Account Groups And Share Posts On The Selected Accounts
  • Instagram posts are shared without an image caption.
  • Commonly Encountered Issues
  • Home
  • Docs
  • Add Social Account
  • How To Auto-publish And Schedule WordPress Posts To TikTok
View Categories

How To Auto-publish And Schedule WordPress Posts To TikTok

< 1 min read

Planly is a social media scheduler for all. With full automation and an advanced interface, the service lets you store your media, plan, and auto-post to social media.

You can use the service to share your posts on TikTok and more.

Go to Planly.com and register an account.

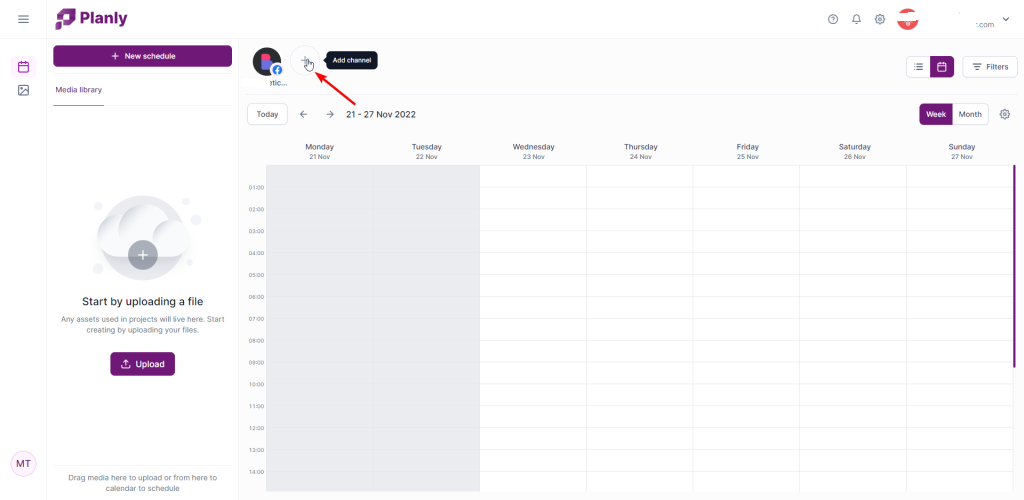
After filling in the necessary information and confirming your email address, you can add social network channels to Planly. To do that, you just need to click the + sign on the top of the page.

Then select the social network that you need to add.

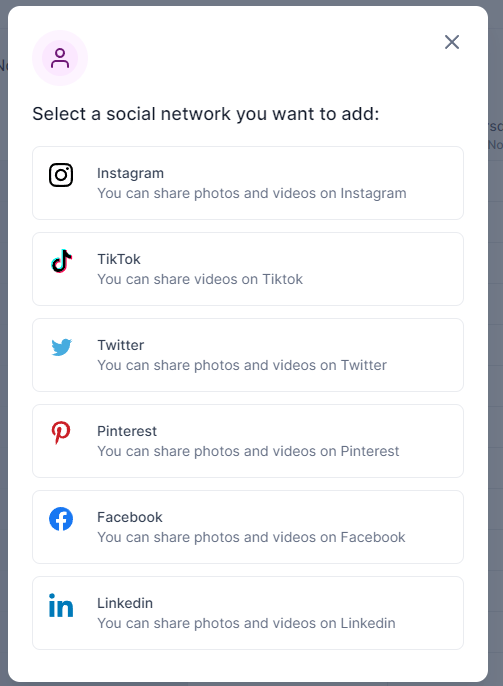
Select the available options to connect your account and authorize the connection.

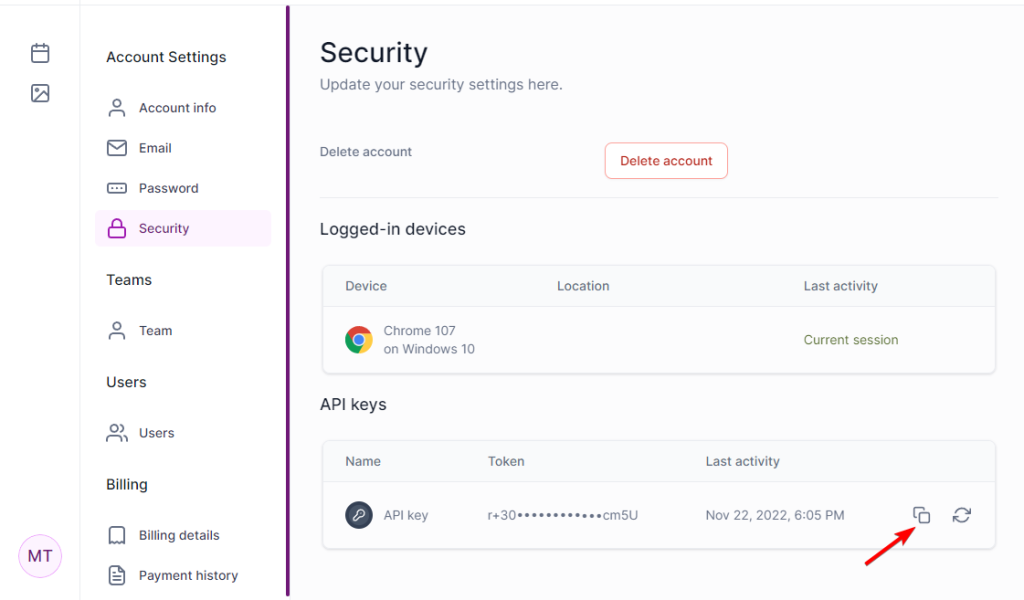
After adding accounts to Planly, you can integrate it into the AItoSocial plugin. Go to the Security settings of Planly and generate an API key.

Then copy the API key and add it to the AItoSocial plugin.

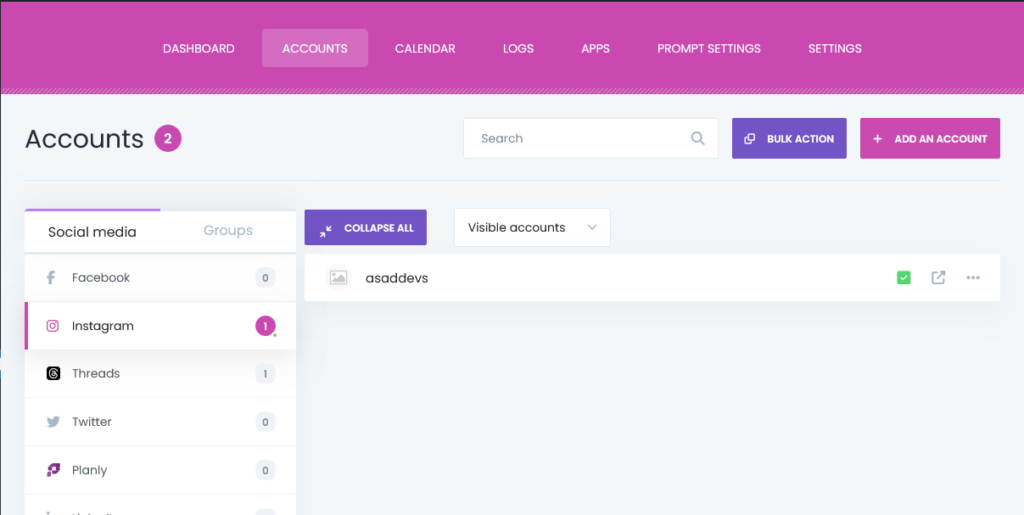
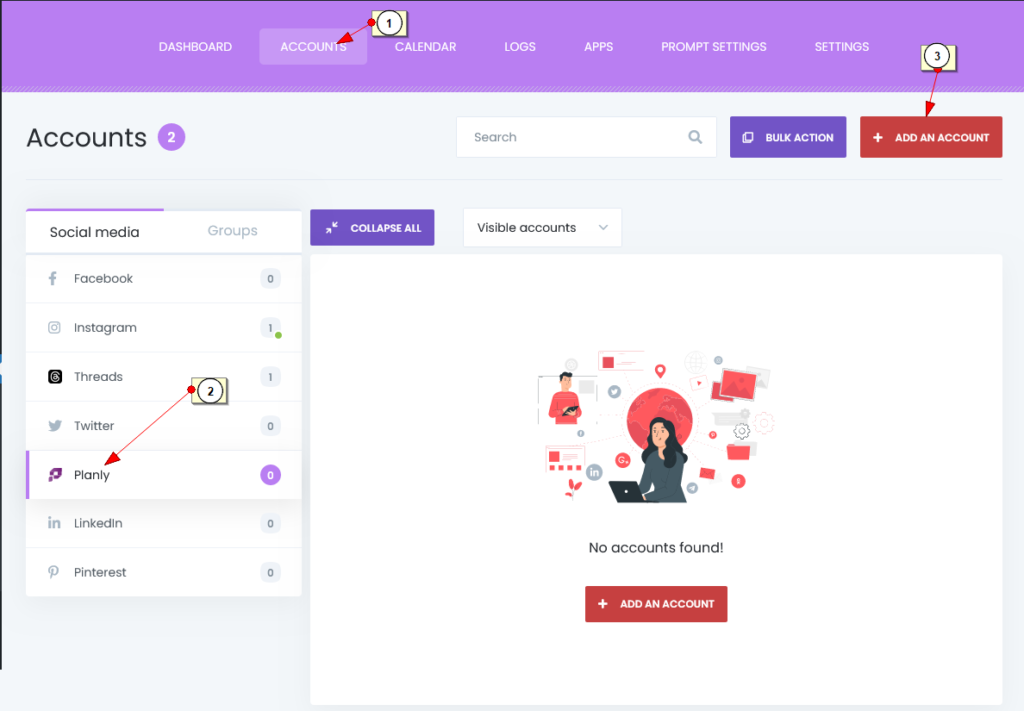
To do that, go to the Planly menu in the plugin and click the Add an account button.

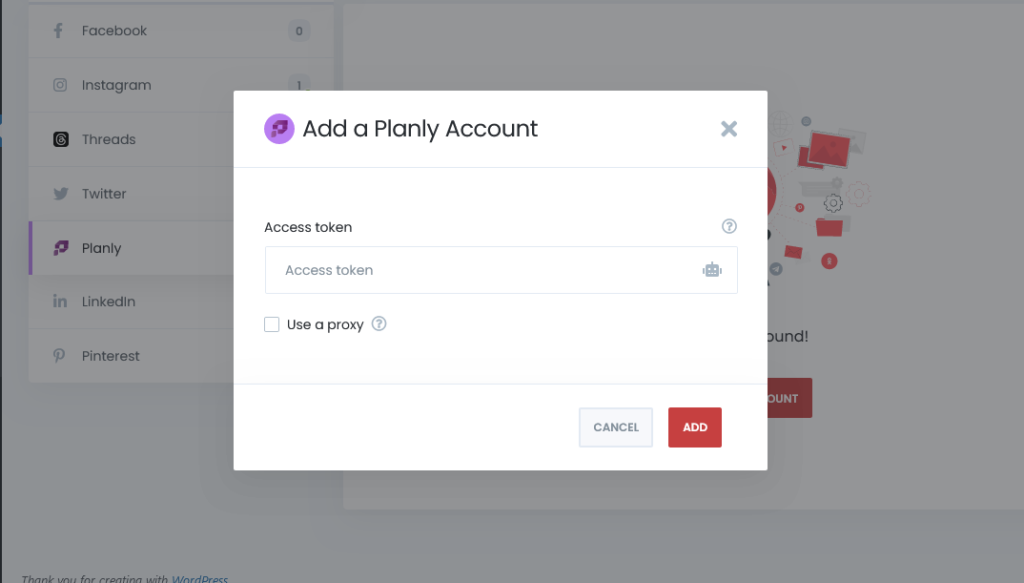
Paste the API key to the dedicated input and click the Add button.

Now, your accounts will be available on the AItoSocial plugin. Activate channels to start sharing.

Add Social Account
Still stuck? How can we help?

How can we help?

Updated on January 15, 2024
Add a Facebook account using the Personal App method.How to add a Pinterest account to the AItoSocial plugin

Powered by BetterDocs

Download Now

AI2Social and Boost Your Social Media Game

It’s not just a smart choice for your social strategy, it’s a smart investment for your budget.

Free Download
Contact Us

About

Transform Your Blog into a Social Media Powerhouse with Ai2Social

Company

  • Home
  • About Us
  • Price
  • Blog
  • Contact

Resources

  • Docs
  • Support
  • Cookie Policy
  • Privacy Policy
  • Terms & Conditions

Newsletter

Copyright @2024, AI2Social All Rights Reserved